Installation
Your computer must have a local copy of the Matrox Design Assistant setup to install Matrox Design Assistant. Some components cannot be installed from a network drive (for example, Matrox GigE drivers). You must also have administrator access to perform the installation.
Once you have obtained your installation media, run DesignAssistantSetup.exe and follow the instructions.
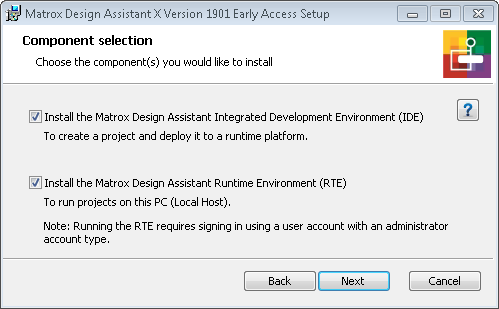
During installation, you will need to select which components to install.

There are 2 components that you can install. On a development computer, installing both components typically provides the best results.
-
Matrox Design Assistant Integrated Development Environment (IDE). Install the IDE to create projects (flowcharts and their associated operator views) on this computer. The IDE can deploy and run projects when connected to a runtime platform.
The IDE provides an emulation mode for working on a project when not connected to a runtime platform. Projects running in emulation mode do not have the ability to grab images, or display an operator view. To access these features on your local computer, install the Matrox Design Assistant Runtime Environment alongside the IDE.
-
Matrox Design Assistant Runtime Environment. Install the Matrox Design Assistant Runtime Environment to use this computer as a runtime platform. Runtime platforms can run projects created using the IDE.
Enabling this option also installs Matrox drivers for GigE Vision cameras, USB3 Vision cameras, non-paged DMA memory, and auxiliary I/O signals.
After installation, a MIL Control Center icon will appear on your desktop. This icon will launch the MIL Control Center and give you access to Matrox Design Assistant, and utilities such as the MILConfig utility.
